![]()
Beautiful Plants For Your Interior
![]()
Beautiful Plants For Your Interior
Discover how to create beautiful, healthy, and eco-friendly Easter decorations with naturally dyed Easter eggs. Learn step-by-step techniques, tips, and recipes for vibrant colors and fun activities for kids.
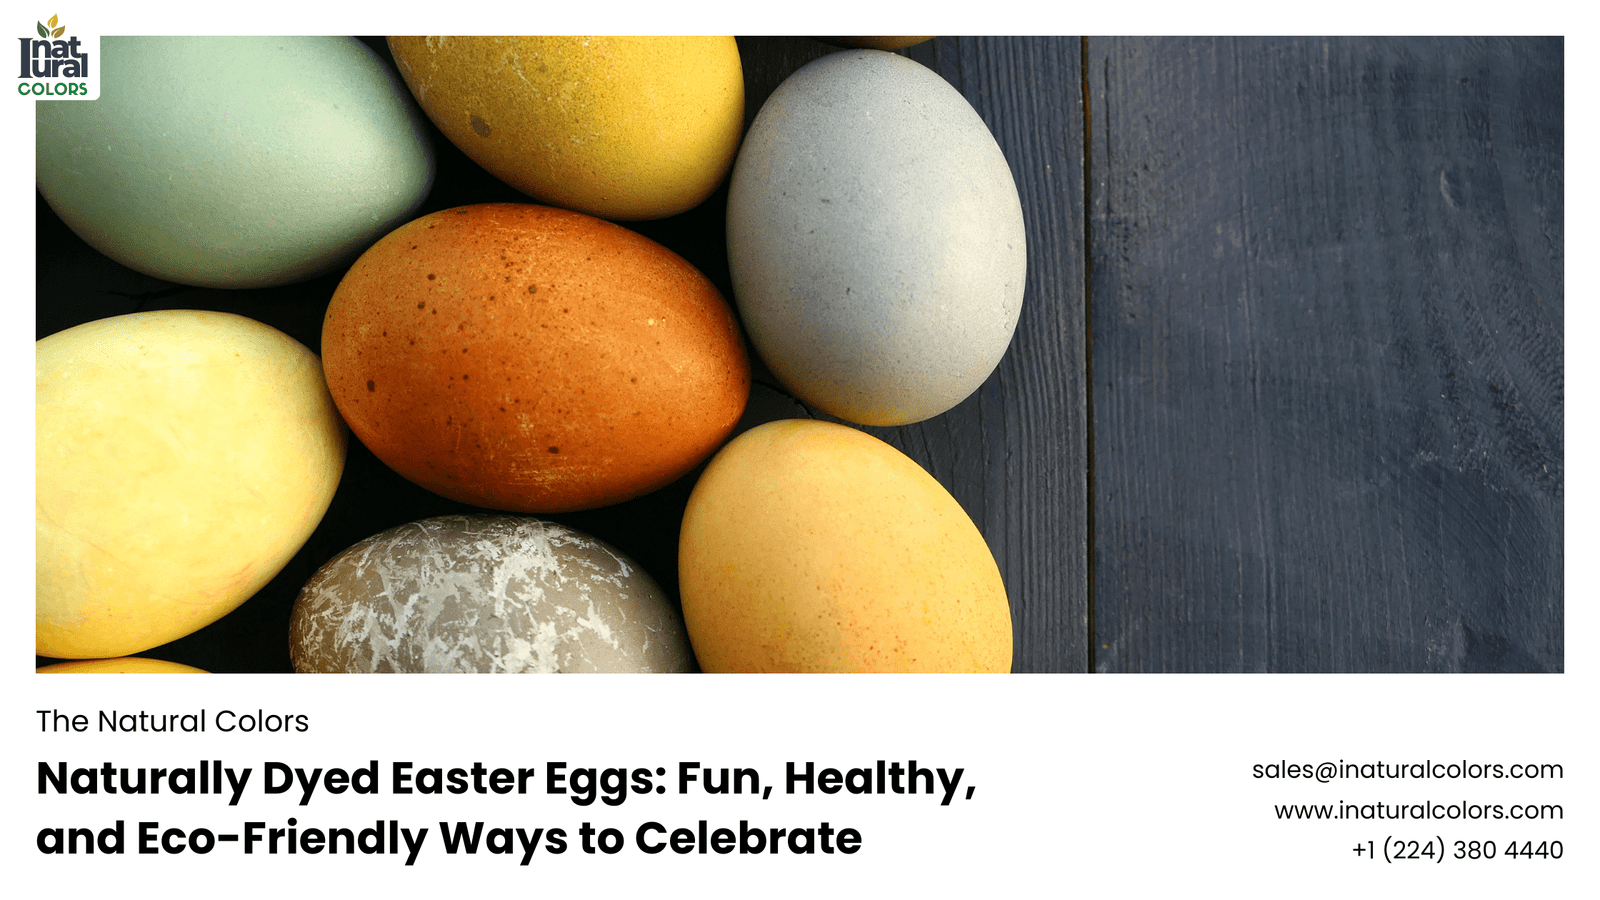
Easter is a time for family, fun, and vibrant colors. One of the most beloved traditions is dyeing Easter eggs. But have you ever thought about using natural dyes instead of synthetic ones? Not only is it a healthier option, but it also brings a unique charm and connection to nature. Let’s dive into the world of naturally dyed Easter eggs and discover how you can create beautiful, healthy, and eco-friendly decorations.
The tradition of dyeing Easter eggs dates back centuries and is steeped in cultural and religious significance. The egg, a symbol of new life and rebirth, was often used in spring festivals. Early Christians adopted this symbol to represent the resurrection of Jesus Christ, making it a key element of Easter celebrations.
Initially, eggs were dyed using natural materials available at the time, such as plants, fruits, and spices. As synthetic dyes became more accessible and affordable, they gradually replaced natural dyes. However, the recent shift towards eco-conscious living has revived interest in natural dyeing methods.
Natural dyes are free from the harmful chemicals found in many synthetic dyes, making them a safer choice for both you and your family. If you plan to eat the eggs, using natural dyes ensures that no toxic substances leach into the egg whites.
Synthetic dyes often contain pollutants that can harm the environment. By choosing natural dyes, you contribute to reducing chemical runoff and promoting a healthier planet.
Using natural dyes connects you with age-old traditions and cultures that have long utilized plants and other natural materials for their vibrant colors. It’s a way to honor and preserve these rich heritages.
Here are some popular natural dye sources you can find in your kitchen or garden:
To achieve the best colors, choose fresh, organic ingredients. Organic produce is free from pesticides and other chemicals that might interfere with the dyeing process.
Start by boiling your eggs. Place them in a pot of cold water, bring to a boil, and let them simmer for about 10 minutes. Once done, transfer the eggs to an ice bath to cool.
Ensure the eggs are clean and free from any debris. You can gently wash them with a mild soap and water. Pat them dry with a paper towel.
To make your natural dyes, chop or mash your chosen dye sources and add them to a pot of water. Use about one cup of dye material to one cup of water. Bring to a boil, then simmer for about 30 minutes. Strain the dye into a bowl and let it cool to room temperature.
For deeper colors, soak the eggs in the dye overnight in the refrigerator. For lighter shades, a few hours should suffice. Rotate the eggs occasionally to ensure even coloring.
Use a spoon to gently stir the eggs in the dye bath occasionally. This helps prevent any uneven patches or spots.
For a multi-colored effect, start with a base color, let it dry, then dip the egg in another color. This can create beautiful, layered designs.
Get creative with patterns! Use rubber bands, leaves, or flowers to create resist patterns. Simply place the object on the egg and secure it before dyeing.
Place the dyed eggs on a drying rack or an old egg carton to dry. Avoid using paper towels, as they can cause smudging.
Once dry, you can rub a bit of vegetable oil on the eggs to give them a nice sheen. This also helps preserve the color.
Show off your naturally dyed eggs in a decorative basket, a clear vase, or on a festive table setting. You can also hang them as ornaments using ribbons.
Naturally dyed eggs make beautiful centerpieces and conversation starters. They can also be used in Easter egg hunts, adding a natural touch to the festivities.
If you plan to eat the eggs, store them in the refrigerator. If they are for decoration only, you can keep them at room temperature.
Hard-boiled eggs should be eaten within a week if kept refrigerated. For decorative purposes, they can last for several weeks if properly dried and stored.
Wear gloves to avoid staining your hands and protect your clothing and work surfaces. Use stainless steel or glass bowls to prevent staining.
Ensure your dye baths are completely cool before adding the eggs to prevent cracking. Also, avoid using eggs with any cracks, as they can absorb too much dye and become inedible.
Involve kids in the dyeing process by letting them choose colors, prepare dye materials, and decorate the eggs. It’s a great way to teach them about natural ingredients and traditional practices.
This activity can be an educational experience, teaching children about natural sources of color, the science behind dyeing, and cultural traditions.
Naturally dyed Easter eggs are a delightful and eco-friendly way to celebrate the holiday. They offer a healthier alternative to synthetic dyes and allow you to connect with nature and tradition. So, gather your ingredients, get creative, and enjoy the fun of dyeing Easter eggs naturally. Happy Easter!